Thursday, January 28, 2016

Tap My Trees (A Schoolhouse Crew Review)

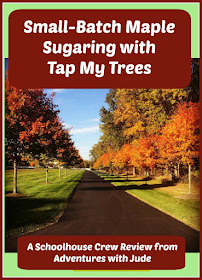
Small Batch Maple Sugaring with Tap My Trees

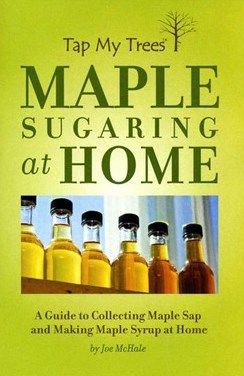
Tap My Trees  is a company started by Joe McHale.  He was interested in teaching his children the origins of their food -- and that it wasn't the local megamart!  However, he didn't want to just tell them about where their food comes from, he wanted to show them.  The problem he found was that most maple sugaring suppliers are large scale operations.  After all, it takes 40 gallons of sap to make one gallon of maple syrup, so tappers are purchasing supplies in large scale quantities. He still wanted to share the process with his children, even if they were only going to wind up with enough syrup for a few breakfasts.   He realized he couldn't be the only person wanting to try his hand at sugaring, and found himself the owner of an agricultural supply start-up!  His Maple Sugaring Starter Kit with Aluminum Buckets contains supplies for tapping up to three trees, and a book about identifying trees, tapping, and creating syrup, making it perfect for the family who wants a taste of sugaring.

Coincidentally, about three days before the Crew announced this review, the kids were asking if we could make our own syrup.  I am a child of the 80s, and in our house, pancake topping came from a bottle with a house or a lady with a kerchief on the front.  It was maple flavored,  we drowned pancakes and toaster waffles alike in it, and we called it good.  I can't complain.  Because of food allergies, we switched to "real" maple syrup when the big boys were young, and now only use that.  (Yes, we're spoiled now.)   Making our own seemed like it could be fun.   When we built our house, Neal knew he wanted lots of trees; as much as I love nature, I can't say I had a strong opinion.  When he decided he wanted to line our driveway with 20-some Fall Fiesta Sugar Maples, and put more in the yard, I just nodded and said, "Whatever you want!"


 So we had maple trees, and kids who wanted to tap them.  We just needed tapping supplies.

When this review came up for assignment, one requirement was that we live in a sugaring area.  Southern New Jersey is probably on the very edge -- though other maples are, sugar maples are not native to our area.

This is one of several "where to find this tree" maps in the guidebook.
Score one for Daddy, thinking ahead and planting sugar maples! We mapped out our trees and anxiously awaited our sugaring kit.  (Two notes: 1 -  it's much easier to map your trees before they lose their leaves in the fall, especially if you haven't planted them yourself, and 2 - while you can tap other species of maple,  birch and walnut trees will also run sap that can be made into syrup.)

Tap My Trees Review
We received our kit and dug in.  It contained three aluminum buckets, hooks, and lids, a drill bit, spiles, cheesecloth for filtering collected sap, and a paperback manual. You really don't need much more than these in terms of "special equipment" to get started, but you'll need "from home" a measuring tape, a drill to bore your tap holes, and pots to boil your collected sap in.  Step-by-step directions tell you how to prepare for the sugaring season, and then how to get underway and collect sap. Instructions are also included for how to remove your spiles and shut down after the sap finishes running for the year - very important if you don't want to harm your tree.

The manual also includes directions on how to tell when it's time to tap.  Generally speaking, tapping time is February or early March, but it all depends on the winter.  Ideal conditions are when the daytime temps are around 40°F and lows are in the 20s, but depending on the weather patterns, it might be a bit of a moving target.  You'll need to consult with an almanac or weather website for what's "average" for this pattern in your area.  In NJ, the average temperatures are in this range in January, but this this winter was pretty warm until about two weeks ago, with lows averaging in the 40s.  If you're farther north, your season might be a little later, but then again,  last year, we had highs in the single digits through February, so the season wouldn't have really started until closer to March here, either.   I like how it stresses you have to watch the weather, not the calendar.  If you're a little off, it's OK, but it doesn't tell you, "Start tapping on this day," and then your kids are disappointed nothing happens (especially if it's "too early" for the year).

If you're reading this and thinking, we have trees, but the temperatures are already in the right zone for this year, either use their store locator and hotfoot it to a brick-and-mortar store where Tap My Trees is a sugaring supplier, or go ahead and order it from their web store  (at the time of this writing, free shipping is standard!) and get started.  A late start means you may not get quite as much sap collected, but you should still be able to make some syrup. (If you're reading this and it's out of tapping season, purchase it anyway, and store it until the season begins for next year, knowing you can really "start" in the summer/fall with the mapping.)

I think that the most important thing you have to do to make this work is make sure your trees are big enough to tap. A tree needs to be at least twelve inches in diameter to safely tap.  Before you purchase this, go out and physically measure your trees.  Measure the circumference at about 54" from the ground and divide by 3.14 to find the diameter. If you don't have a tape measure but know approximately when they were planted, you can estimate your tree's size, using this table and the age of your trees. The diameter in inches x growth factor = tree age, so with a little algebra,  a 10 year old sugar maple tree = 5.5 x diameter, or approximately 2".  A mature, 12" tree will be in the vicinity of 60 years old, so if they're recently been planted (recently being "not by your grandparents"), odds are good the tree is going to be too small to safely tap. Unfortunately for us, that means we'll have to take to our woods with a tape measure in search of some mature trees, and leave Daddy's trees alone, even though the oldest ones are a still-respectable 15 to 20 years old.

The rest of the hardware in the kit is sturdy, and with proper care, will last through many seasons of sugaring.  The pails and lids (and spiles) are sturdy enough that they will last being outside for a month or two at a time, but are lightweight enough that you'll be able to carry one that's been filled with sap.


I think this is a great activity for families.  We will boil down some "homemade sap" (sugar and water) to mimic making syrup, but it would have been really neat to make our own maple syrup for breakfast.  It takes a lot of work to get food from its source to the table, and this kit would do a great job of demonstrating that the dreaded chore of slogging to the megamart really is the "easy" part!

To learn more about Tap My Trees and their sugaring kits, click the banner below to read other reviews, or follow Tap My Trees on social media:

Facebook: https://www.facebook.com/TapMyTrees/

Twitter: https://twitter.com/tapmytrees

Instagram: https://www.instagram.com/tapmytrees/ 

Pinterest: https://www.pinterest.com/tapmytrees0518/ 

YouTube Channel: https://www.youtube.com/channel/UCB6yQre-XsOl6bo6dO-K5Xw
 

Tap My Trees Review


©2012- 2016 Adventures with Jude. All rights reserved. All text, photographs, artwork, and other content may not be reproduced or transmitted in any form without the written consent of the author. http://adventureswithjude.com

Monday, January 25, 2016

Blogging Through the Alphabet - M


Welcome to Blogging Through the Alphabet! 

This is Week 13 of this series, so everyone is sharing posts themed about the letter "M".  We can't wait to see what everyone has written about!

Don't forget that any bloggers who link up for all 26 weeks will be eligible for a Mystery Gift Giveaway at the end of the series!


This is a few- rules link up!  Our requests?

1.  Follow your hosts.


Through the Calm and Through the Storm


Adventures with Jude


2.  Please link back to this page in your post, so others can find the party!

3.  Visit others linked up -- what's a party without mingling?


©2012- 2016 Adventures with Jude. All rights reserved. All text, photographs, artwork, and other content may not be reproduced or transmitted in any form without the written consent of the author. http://adventureswithjude.com

Vegan Chocolate Fudge Sauce (M is for Mocha)

Celia just began a new food trial last week - coffee! At first, we thought that maybe it seemed like a "waste" of a trial, because it's not like coffee is a nutritional powerhouse or anything. However, it is something that would give her a new flavor. I've seen lots of recipes for a coffee "spice rub" for pork, and it would be something nice to add to ice cream base.  Plus, it's something that is pretty ubiquitous -- every restaurant and gas station has it.  Obviously, creamer isn't an option for her (dairy or soy!), but black with sugar is definitely doable.  I mentioned that she could even get that as a treat at Starbucks with Daddy, and her eyes turned wide as saucers:  "You mean you can get a PLAIN COFEE at Starbucks?"  Hard to believe, but yep, you can!

So far, she's doing OK with it. Two more weeks with no reaction, and she gets to keep it "for good." Although she prefers it with a bit of coconut milk as well, she does like it with just a bit of sugar, and is enjoying sampling lots of coffee.


Her brother's favorite coffee drink is a mocha frappe, and she wanted to try one with "her" ingredients.  I made this chocolate fudge sauce for her to add to a blenderful of coffee and ice...and apparently on top of her ice cream, and strawberries...and to dunk her bacon in...  This week's Blogging through the Alphabet theme may be "M is for Mocha", but she's pretty much decided that fudge sauce is pretty good on nearly everything!

Vegan Chocolate Fudge Sauce

1 can (11.5 oz) sweetened condensed coconut milk
1/4 cup cocoa powder
1 tsp kosher salt

Heat the coconut milk until it begins to steam, and add the cocoa powder.  Whisk briskly to combine. Add the salt and whisk again.

For a hot mocha, add 2 Tbsp of syrup to 8 oz of coffee.  It will be sweet and chocolatey, but not overpowering the coffee flavor.  For everything else, just spoon it on to taste.  (You can re-warm it to make it more syrupy for mixing into coffee, or leave it chillled for a more fudgy consistency.)


Store in a glass jar for up to a week, but it probably won't last that long.


 ©2012- 2016 Adventures with Jude. All rights reserved. All text, photographs, artwork, and other content may not be reproduced or transmitted in any form without the written consent of the author. http://adventureswithjude.com

Monday, January 18, 2016

Blogging Through the Alphabet - L


Welcome to Blogging Through the Alphabet! 

This is Week 12 of this series, so everyone is sharing posts themed about the letter "L".  We can't wait to see what everyone has written about!

Don't forget that any bloggers who link up for all 26 weeks will be eligible for a Mystery Gift Giveaway at the end of the series!


This is a few- rules link up!  Our requests?

1.  Follow your hosts.


Through the Calm and Through the Storm


Adventures with Jude


2.  Please link back to this page in your post, so others can find the party!

3.  Visit others linked up -- what's a party without mingling?


©2012- 2016 Adventures with Jude. All rights reserved. All text, photographs, artwork, and other content may not be reproduced or transmitted in any form without the written consent of the author. http://adventureswithjude.com

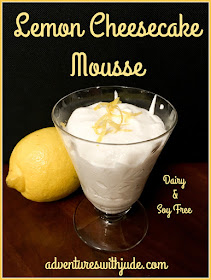
Dairy and Soy Free Lemon Cheesecake Mousse (L is for Lemon)


no bake dairy and soy free lemon cheesecake

For several years now, I have been  trying to get a more traditional cheesecake recipe to work with dairy- and soy-free cream cheese, but it wasn't working.  We recently tried a vegan no-bake cheesecake recipe, and suddenly, my mine raced with possibilities. No-bake cheesecake isn't exactly the same as a New York style cheesecake, but it's still delicious.  Plus, it's ready almost immediately, rather than hours later. I'm always on the hunt for quick desserts, so my math says fast + cheesecake = perfect.

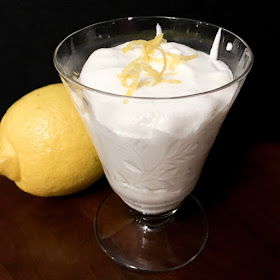
After lots of googling and comparing recipes, I came up with this lemon-flavored one.  You certainly could put it into a crust (I like using Enjoy Life soft cookies as a press-in-the-pan crust), but I decided to serve this one in dessert glasses, making the lemony mousse the star of the show.  To serve, I topped with a bit of lemon zest, but you could use cookie crumbs or even fresh berries.  Best of all, this dessert is ready as soon as it has been put together, so it's perfect for last-minute dinner guests -- or just when you're craving some cheesecake!

Lemon Cheesecake Mousse


1 package Daiya cream cheese (8 oz)
1 can sweetened condensed coconut milk
1/2 cup lemon juice, divided
1 packet unflavored gelatin*

Whip the cream cheese until smooth and fluffy.  Add in the sweetened condensed milk and continue whipping on high for 3 minutes.


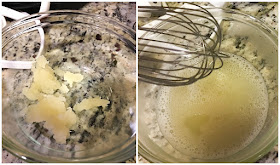
 Place about 1/4 cup of lemon juice in a bowl.  Stir in the gelatin.  Heat the other 1/4 in the microwave until hot (slightly steaming), about one minute.


Add the hot juice to the gelatin mixture, and stir with either a whisk or fork until liquefied and smooth.  Slowly this to the cream cheese mix, and beat until fully incorporated.

Spoon into dessert glasses (or a prepared pie crust for a traditional cheesecake).  Top with lemon zest (or fresh berries, or mini chocolate chips...) It can be served immediately, or stored covered in the refrigerator.

no bake dairy and soy free lemon cheesecake


 *Note: Gelatin can be omitted to make a vegan mousse, but the texture may not remain as fluffy.  Add the cold juice to the whipped cream cheese and milk mixture in the same order. 


©2012- 2016 Adventures with Jude. All rights reserved. All text, photographs, artwork, and other content may not be reproduced or transmitted in any form without the written consent of the author. http://adventureswithjude.com

Friday, January 15, 2016

Navigation by the Stars


Since the beginning of time, people have traveled to new places, both by sea and land. Modern GPS uses man-made satellites launched into space to aid navigators, but long before these machines, or even the simple compass, travelers have used the natural satellites in the heavens: the stars. Explorers took advantage of the stars’ unwavering presence and patterns to guide them on their journeys.

There are many ways that stars helped the early sailors before modern sailing technology. They were used to help many early sailors navigate the seas during the night. Without having a way to actively maintain their course after the sunset, ships would have been blown off course, never made it to their destinations, and never make it back to their home port. Sailors used the stars to determine their latitude. Sailors in the northern hemisphere could use the North Star to “anchor” their direction, or use the Southern Cross (Crux) constellation in the southern hemisphere.  By placing these celestial pole-markers in front or behind them, the navigators knew which direction they were going.

Polaris, also known as the North Star, is part of the
Ursa Minor constellation, more commonly called the "Little Dipper"
Did you know that the name “Polaris,” used for the North Star, is not actually the name of this guiding star? Astronomers have found that as the earth moves, a different star can come into prominence as the north pole star. Before the current “Polaris” ascended to its position, it used to be called Phoenix. Scientists believe that eventually the star Vega will become the most prominent northern star.

The stars and constellations functioned as a calendar and clock as well. The stars and constellations were first named by early Greek and Roman astronomers. A constellation is a group of stars forming a recognizable pattern that is traditionally named after its apparent form or identified with a mythological figure. They discovered that while some constellations (Ursa Major and Minor, Cassiopeia, and Cygnus) could be see nearly every night, others were only seen seasonally, or in different places depending on the season. Astronomers recording the time and location of constellations created star maps. It certainly helped that the Roman Empire was so far-reaching; it meant there were wide variations in latitude. A map from one location could be checked against another to help sailors navigate north and south. During the day, the angle of the sun was used as a clock. At night the Big Dipper’s positioning was used as a 24 hour clock to tell time. By using these positions, navigators would be able to determine if they were traveling east or west.

Cygnus - the Swan. 
If you look carefully, you can imagine the neck extending up to the left,
and the stars that form his body and tail in the lower right.
When we think about navigation by the stars, we think of ships on the open seas, with no landmarks to help them. But what about traveling across unfamiliar land? One couldn’t write “Turn left at the third tree,” and be sure that the directions would remain accurate! Were the sun and stars also used for land travel? Of course. By using the same navigational principles, travelers could cross overland. The sun was used during the day on land to determine direction during travel, and stars would re-orient their paths at night.  When there was enough moonlight for the travelers to see any obstacles on the ground, they could also use the stars to travel at night. Using the constellations was how escaped slaves slipped through the darkness to freedom.  They would follow the "Drinking Gourd," their name for the Big Dipper, knowing that its handle never wavered in pointing them towards the right direction.


Perhaps the most famous single "star" used for overland, overnight travel is the one that brought the three Magi to Bethlehem. However, modern astronomy has disproved that the Star of Bethlehem was just any star. In fact, it probably wasn’t even a star at all! Based on the history of the Roman Empire and the census that called Mary and Joseph to Bethlehem, the location of the city, and patterns seen since, the “Star of Bethlehem” was likely either a comet called Kepler, a supernova (exploding star), or a planetary abnormality and/or alignment. 

Star and constellations were used for navigation in many ways. They were used by sailors to be able to tell the location of their ships and the direction to travel in. The were also used as a calendar and a clock. Overland travel was aided by the position of the sun and stars as well. As long as the navigators could see the stars, they could travel. May you always have clear skies and smooth sailing!

Photo note: We took these pictures of the stars in "real time" using the Skyview: Explore the Universe App.  It's pretty cool for navigating the backyard in modern times, or even just amateur star gazing.  Plus, it shows celestial bodies' regardless of where you are.  By aiming the camera south and through the floor, we were able to "see" the location of Crux through the earth!  When we took this photo, Mercury, Saturn, and Scorpio were not visible outside due to placement and daylight, but we were able to "find" them in our kitchen.


©2012- 2016 Adventures with Jude. All rights reserved. All text, photographs, artwork, and other content may not be reproduced or transmitted in any form without the written consent of the author. http://adventureswithjude.com

Monday, January 11, 2016

Blogging Through the Alphabet - K


Welcome to Blogging Through the Alphabet! 

This is Week 11 of this series, so everyone is sharing posts themed about the letter "K".  We can't wait to see what everyone has written about!

Don't forget that any bloggers who link up for all 26 weeks will be eligible for a Mystery Gift Giveaway at the end of the series!


This is a few- rules link up!  Our requests?

1.  Follow your hosts.


Through the Calm and Through the Storm


Adventures with Jude


2.  Please link back to this page in your post, so others can find the party!

3.  Visit others linked up -- what's a party without mingling?


©2012- 2015 Adventures with Jude. All rights reserved. All text, photographs, artwork, and other content may not be reproduced or transmitted in any form without the written consent of the author. http://adventureswithjude.com

Cooking on the Road (K is for Kitchen Gear)


We've been on vacation, so I'll start out by saying we didn't really do any recipe development this week.  About as exciting as it got was coating chicken in crushed potato chips to use them up.  (Hey, Damien was impressed!)  Instead, this week, I'm sharing our list of favorite kitchen supplies for when we're on vacation.  With our allergy-restricted diets, it's usually easier to pack food. 

Two summers ago, Luke shared his packing list for big multi-day field trip.  We were only gone for a few days, so we were able to organize everything in our large cooler.  Last summer, we spent 26 days zig-zagging around the country, and had to pack not just for eating, but cooking.  (In addition to allergies, we spent a lot of time literally on the road driving places, so being able to just make up a quick meal in the hotel room when we finally settled in for the evening was a big deal.)  We started our trip with a new cooler - hubby's gift to me for my birthday.


This is probably the best cooler we've ever used.  It plugs into the car - keeping the food cool without filling the cooler with ice - but also into the hotel room wall, so we didn't have to unpack and re-pack it all the time.  (It also is great for grocery shopping!)  It fits several days' worth of cold food, and combined with a large bag of dry goods, we can pack enough food to feed 6 people for almost a week!

Our "Kitchen Bag" is our other must-have item.


It contains items dedicated to road trip, and lives on a shelf in the garage, so it's ready to go when we are.  Whether we have a full-kitchen, or just a microwave, it goes with us.  (You'd be surprised how skimpily "full amenity" kitchens are furnished!) The bag's current contents include:

-a baking sheet
-a 9x13 baking pan
-a collapsible colander
-large plastic container (it doubles as a mixing bowl)
-zip-top bag with basic spices: salt, pepper, garlic powder, apple pie spice
-aluminum foil (we like the No-Stick variety)
-large serrated knife
-flexible cutting sheets
-flashlight
-dish soap
-picnic plates
-bag with plastic utensils & napkins
-gallon size zip-top bags
-corkscrew

I'm currently searching for a slightly larger bag, because our Pyrex dishes don't fit in it.  Two 3-cup Pyrex dishes (with lids) also travel with us, because the glass is microwave-friendly.  The 3-cup size is just large enough to cook a package of Daiya macaroni and cheese noodles.  (Drain them with the colander, and then return to the Pyrex dish to mix in the cheese sauce. It's a tight fight, but it works.)  Currently, I need to remember to pack them when we go, so a larger bag will let them remain packed.

We're definitely going to need a larger bag, because after this trip, we've determined we need to add a few more things:
-a paring knife
-a sharpie (for labeling cups)
-a pair of scissors
-collapsible measuring cups

I will admit that 'minimal" is not how I'd prefer to cook every day, but for a week or two on the road, it's adequate. I wouldn't want to be without my good French knife, long term, but for the sake of having ONE multi-tasker, a serrated knife cuts tomatoes as well as raw chicken.  (Just wash between!)  We actually have managed to cook dinner without the baking pan (I once made a roasting pan for meatloaf out of a baking sheet and aluminum foil), but it's definitely much easier to bake brownies with a real pan.  (No-Stick Foil doubles as a pan liner and wrapper for the leftovers.)


We also take our electric skillet (plus spatula and pair of tongs, tucked into the kitchen bag), if we're not going to have access to a real kitchen.  Often we'll make one food item in it (pancakes, eggs, saute-cut meats, etc.) and use the hotel's microwave to heat side dishes (sausage links, baked potatoes, macaroni and cheese, etc.)   We've even "baked" chicken nuggets and cookies in the skillet!


With a little planning and some minimalist packing, hotel eating can be just as good as at home!


©2012- 2015 Adventures with Jude. All rights reserved. All text, photographs, artwork, and other content may not be reproduced or transmitted in any form without the written consent of the author. http://adventureswithjude.com

Monday, January 4, 2016

Blogging through the Alphabet - J


Welcome to Blogging Through the Alphabet! 

This is Week 10 of this series, so everyone is sharing posts themed about the letter "J".  We can't wait to see what everyone has written about!

Don't forget that any bloggers who link up for all 26 weeks will be eligible for a Mystery Gift Giveaway at the end of the series!


This is a few- rules link up!  Our requests?

1.  Follow your hosts.


Through the Calm and Through the Storm


Adventures with Jude


2.  Please link back to this page in your post, so others can find the party!

3.  Visit others linked up -- what's a party without mingling?


©2012- 2015 Adventures with Jude. All rights reserved. All text, photographs, artwork, and other content may not be reproduced or transmitted in any form without the written consent of the author. http://adventureswithjude.com

Tequila Sunrise Chicken Soft Tacos (J is for Jose Cuervo)


Soft taco shells are a staple in our house. I stopped buying hard taco shells years ago - somebody was allergic to something in the brands I could find, and I started buying soft shells to make our own tostadas and fresh chips (oh, yum!!). One night, I just didn't feel like the mess frying would make, so we had soft tacos.  Delicious! 

Fillings can be anything you'd like.  We've found that "strips" work best for protein - ground meat tends to fall out all over.  Sometimes I'll use fajita steak, but for this post, I told Luke to fine a tequila chicken recipe.  He found about four pages of them, so he compared notes, mixed and matched, and came up with this.  I have to say that I'm impressed at his "from scratch(pad)" skills.  These were delicious!

Tequila Sunrise Chicken


1/2 c. tequila
3 limes, juiced (or 6 Tbsp bottled lime juice) + 1 lime cut into wedges
1/2 c. orange juice
2 Tbsp kosher salt
2 Tbsp garlic powder
2 Tbsp black pepper
1 Tbsp chili powder


Combine ingredients.

Place 6 chicken breast halves in a one-gallon zip-top bag and carefully pour marinade over.


Seal the back most of the way, and then squish out any air.  Seal the bag fully.  (This marinade will make enough to flavor up to 10 pieces of meat, but it gets crowded in the bag.  We should have made two recipes and divided it into two bags.)


Shake and/or massage the bag to coat all of the chicken with the marinade.  Place the bag in a bowl (to catch any leaks, if your bag has any pinholes) and the bowl into the fridge for 30-60 minutes. Jiggle the bag around every 10 minutes or so to redistribute the marinade.


Don't marinate longer than an hour, or the acid in all of the citrus will start to "cook" the chicken.  The acid denatures the protein, akin to cooking, but when you add heat to cook the meat properly, it will become "overcooked" and tough.

Grill or pan-fry chicken until it is cooked through, about 4-5 minutes on each side. Remove from grill to a cutting board and allow to rest 2-3 minutes.

Cut chicken into strips.  Cut across the chicken (rather than lengthwise) so they aren't stringy. Use the wedged lime, and top chicken with fresh lime juice.


 Serve with warmed corn tortillas and traditional toppings: cheese, pico de gallo/salsa, sour cream, etc.  And of course, margaritas for the adults!


©2012- 2015 Adventures with Jude. All rights reserved. All text, photographs, artwork, and other content may not be reproduced or transmitted in any form without the written consent of the author. http://adventureswithjude.com