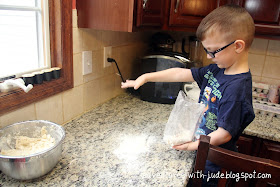
Today, we are sharing how to make Mom Mom Woody's rugelach recipe, remade safe for our family's allergies. We need to avoid dairy, soy, and nuts for Jude and Matthew, "just nuts" for Luke, and wheat for Daddy. It's taken a lot of practice, but we have learned how to remake old favorites into safe treats!
First, Mom Mom Woody's recipe.
4 1/2 c flour
2 1/2 heaping tsp baking powder
3/4 c sugar
1 tsp vanilla
2 eggs
1/2 lb butter
1 cup milk
melt butter & mix with 1 cup milk, combine all other ingredients, roll out flat, spread filling over dough, roll like jelly roll, slice & bake for 20-22 min @ 350 degrees on greased cookie sheet3/4 c sugar
1 tsp vanilla
2 eggs
1/2 lb butter
1 cup milk
Aunt Debbie made these recently, and told us she thought it was supposed to be 2 1/2 tablespoon of baking powder. We tried it with the adjustment, and they turned out great. (I'm not sure how hers turned out in the end, but the change didn't hurt any.)
Our recipe:
Makes about 4 dozen pastries
5 1/2 c. King Arthur Gluten Free flour mix
2 Tbsp xanthan gum
2 1/2 heaping Tbsp baking powder
3/4 c. sugar
1 tbsp home-brew vanilla (see note)
2 eggs
6 oz/170 g. shortening, melted
1 c. So Delicious coconut milk beverage
Rugelach fillings (see below)

Preheat oven to 350*F. (Melt shortening in microwave-safe container. Set aside.)

Combine flour, xanthan gum, baking powder and sugar.
Crack the eggs, and lightly beat until mixed.
Combine eggs, vanilla, and coconut milk.

Add melted butter to flour mix, and stir to coat. Add milk mixture and combine. The dough will be crumbly, but will stick together when pressed.
Gather a softball sized amount of dough, pressing it into a ball in your hands.

 You can turn it out onto a floured countertop, to roll, but we had issues with the dough sticking.
Parchment paper made rolling much easier!

Roll dough to about 1/8" thick. It's a very tender dough, so don't roll it too thin, or it will be more prone to falling apart.

Spread a thin layer of filling on the dough.

If necessary, turn the dough so the long edge is away from you. Roll up the dough into a log. (This is where the parchment paper comes in handy!) Trim the edges.

Cut into pieces two fingers wide (just over an inch) and place on a greased cookie sheet. We lined ours with no-stick foil.
Bake 20-23 minutes, or until lightly browned.
Remove from oven, and allow to cool before eating (the filling will be hot).

 We planned to (and did) use chocolate spread. We love Hashahar spread, and stock up on the Kosher-for-Passover version because it is dairy, soy, and nut free, but any chocolate spread (ie Nutella) would work.
Other fillings you could use include mohnfullung (a poppyseed paste traditionally used for Hamentashen), other flavors of jam, or finely chopped nuts. At the last minute, Jude decided we needed to make another kind, so I dug through the cabinet to see what we had. I found a jar each of prune and cherry fillings. Jude decided he wanted to make Daddy's favorite, cherry. He also spotted a bottle of sprinkles leftover from Christmas -- so we made an "Everything Flavor" batch with chocolate, cherries, and sprinkles. Why not?
A note on vanilla: you can use regular store bought vanilla, and drop the measurement back to 1tsp. However, we make our own vanilla here, because it's a whole lot cheaper. (Store-bought vanilla costs at least $3/ounce; even using a little extra is OK because it works out to less than a dollar an ounce, plus you control the ingredients. We use potato vodka for the base of ours, so we know it's gluten free. You can also use rum to make your vanilla, but it is slightly less neutral tasting.) Take 4-5 vanilla beans and slice longways in half. Slide them into 1L bottle of neutral spirits. Although it will get stronger the longer it sits, it will be ready to use in about two weeks.
The last part of the directions?? Eat and enjoy!
Snacktime is better when shared with friends!


That looks so delish!!
ReplyDeleteYummy! I want some.
ReplyDeleteThese look yummy! Thanks for sharing at Food on Friday!
ReplyDeleteThese look so good, wish I had known how to substitute for allergies when my son still lived at home. He had a bunch of foods he was allergic too, nothing life threatening, but it would have made things so much better for him.
ReplyDeleteThanks for linking up at Kids and a Mom in the Kitchen!